THE $500 CLOSET MAKEOVER
This post contains affiliate links. As an Amazon Associate, I earn from qualifying purchases, at no extra cost to you.
Our closet was not a complete disaster, but it was crowded, dark and didn't look polished at all.
We moved into this house when we had a 3 month old and just unpacked everything without trying too hard, out of necessity, survival even. But I was growing very tired of looking at it this summer and took on the project. Perhaps it was a distraction from the looming major life event of launching my first child, or maybe I was just tired of the closet.
Either way, I'm happy with the end result, and all it took was about 3 days - working when I could between parenting and packing for a girls trip to New York - and about $500.
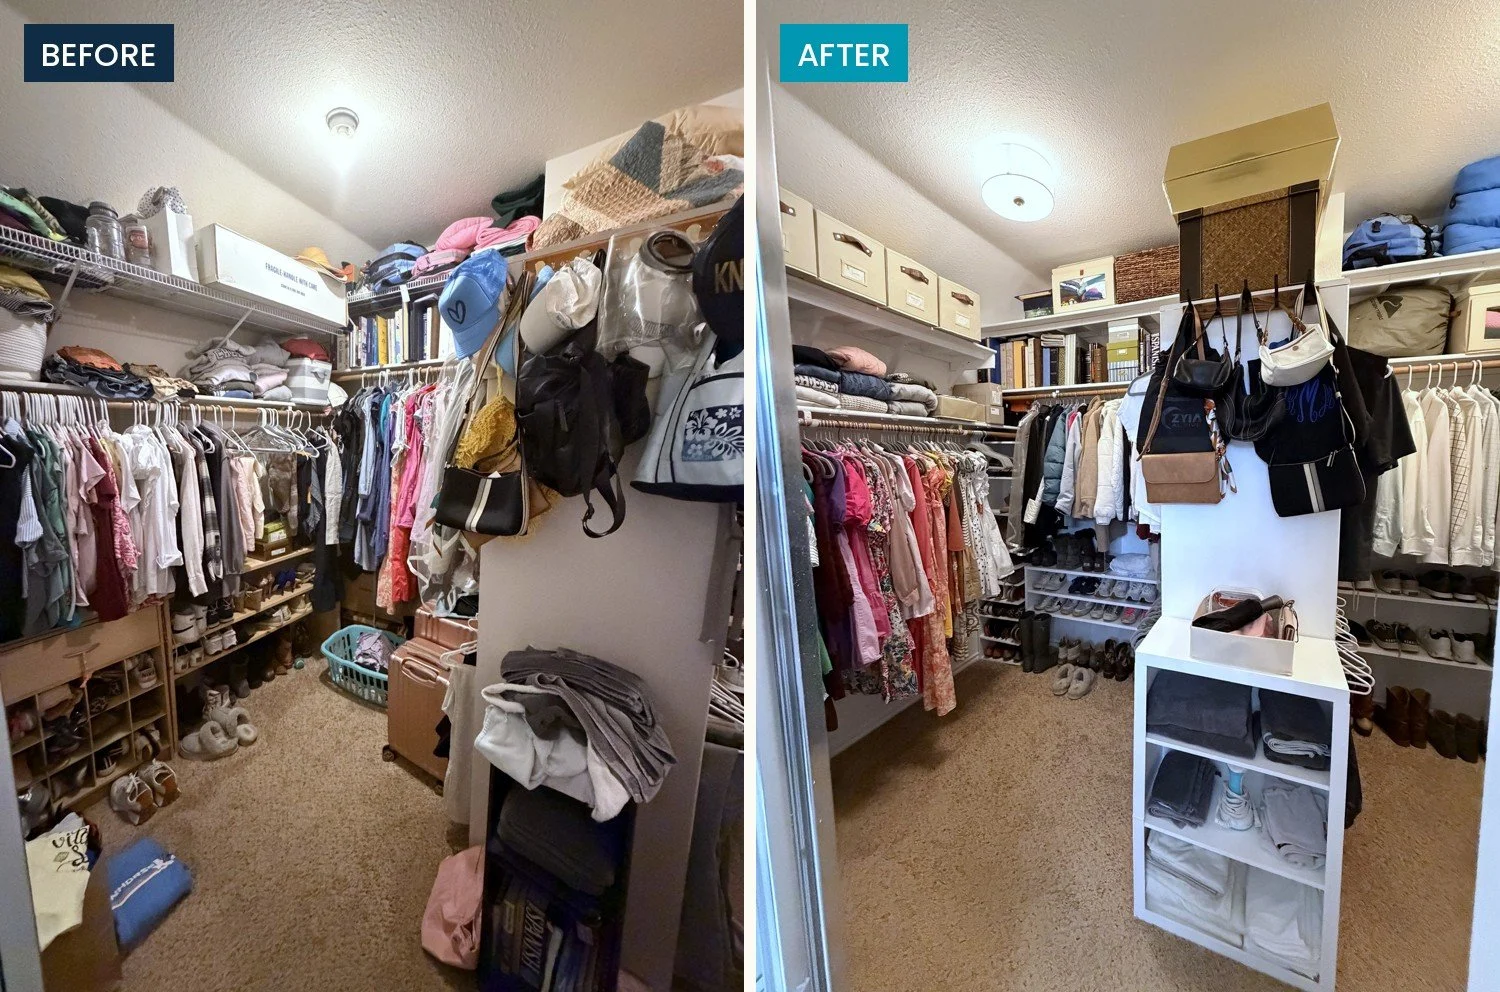
🧺 FIX #1- PURGE & RELOCATE
First, I emptied the whole closet. Everything lived on surfaces in our bedroom for 2-3 days, which was annoying, but it was short-lived.
This part may be hard for some of you to hear, but I did purge 2 trash bags full of clothes and shoes. I went through every article in there and asked myself very honestly, “have I worn this in the last 2 years?” Honestly, I even kept some things I answered “no” to, but it was strangely easy to let go of most of it!
I also relocated the extra pillows and blankets we were storing in there for guests and sleepover situations to the top shelves of the bathroom linen closets. That freed up some cluttered space.
🪚 FIX #2- THE SHELVES
My husband built two pieces:
A corner shoe tower, 14 inches by 14 inches in the corner and 87 inches tall, with ten fixed shelves about 12 inches deep. It holds more than twenty pairs. $140 in wood.
A low unit, about 36 inches wide, 14 deep and 24 high, for folded stacks. $60 in wood.
How he knew what to build: I had AI draw me a spec sheet. Dimensions, shelf spacing, a materials list, and a plan view of how it fits into the corner. I handed it to my husband, he's handy, and he did the rest.
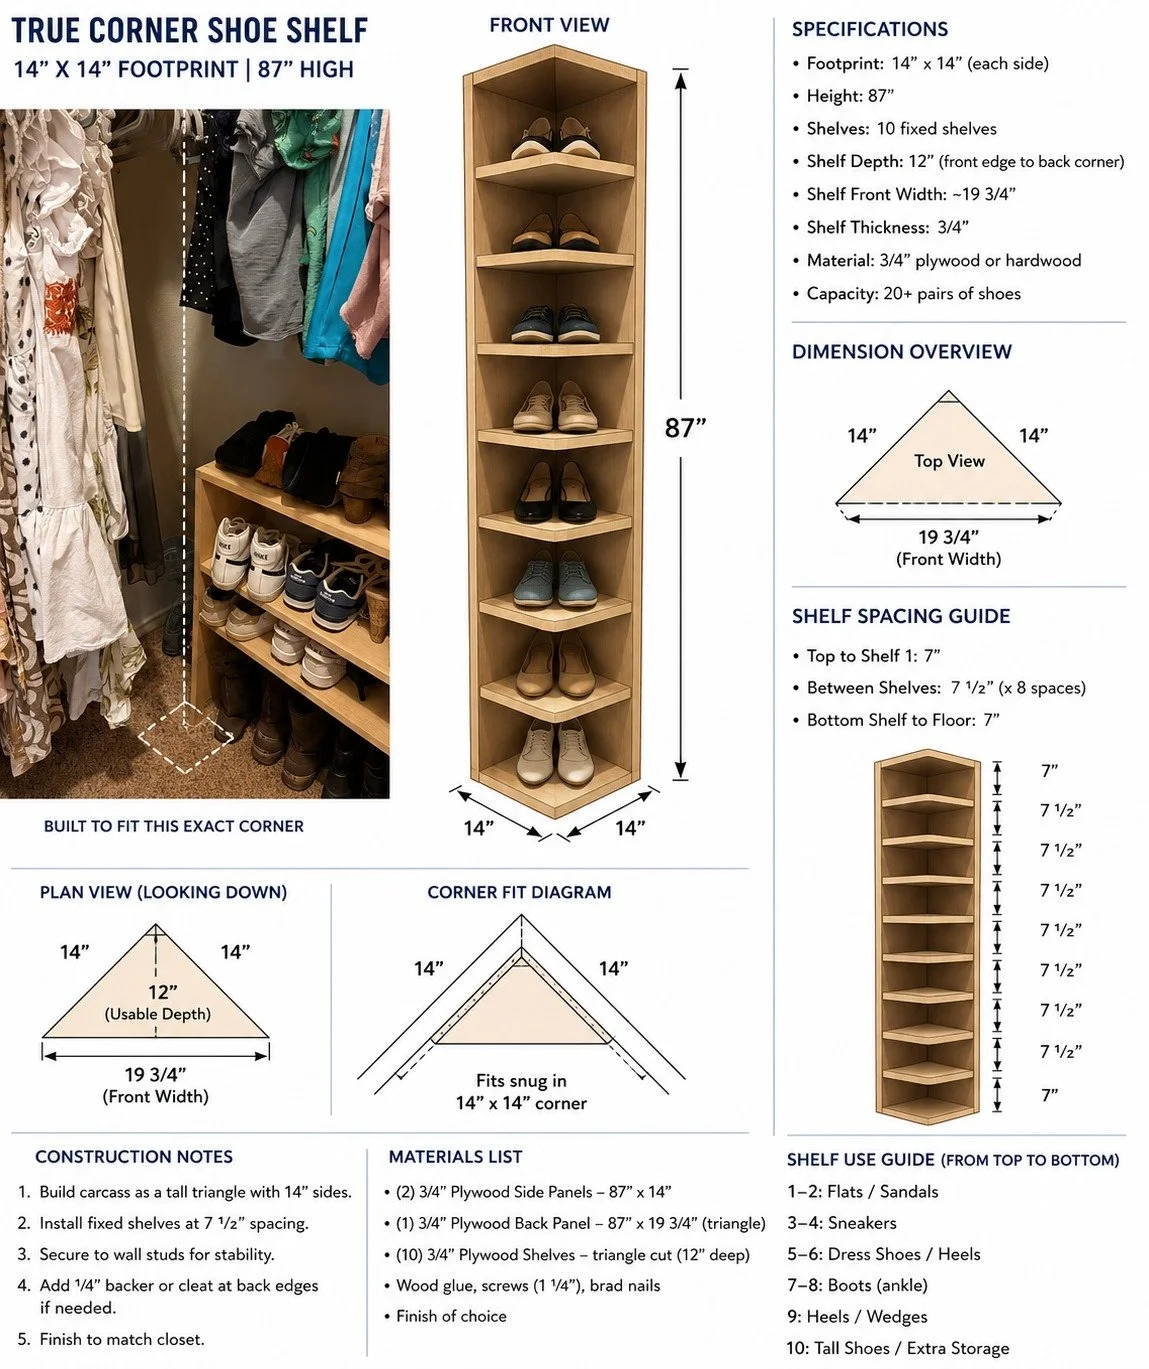
The AI plan I handed my husband. He set the shelves at his own heights as he built, so measure your space before you copy it,
He didn't follow the spacing on it, for the record. The plan had all ten shelves evenly spaced and he set them at different heights instead, which turned out better than what I handed him. Heels need more room than flats, and now they have it.
The tower was built specifically to fit in the corner next to an existing shoe shelf, and low enough to fit perfectly under the built-in shelves above the hanging clothes.
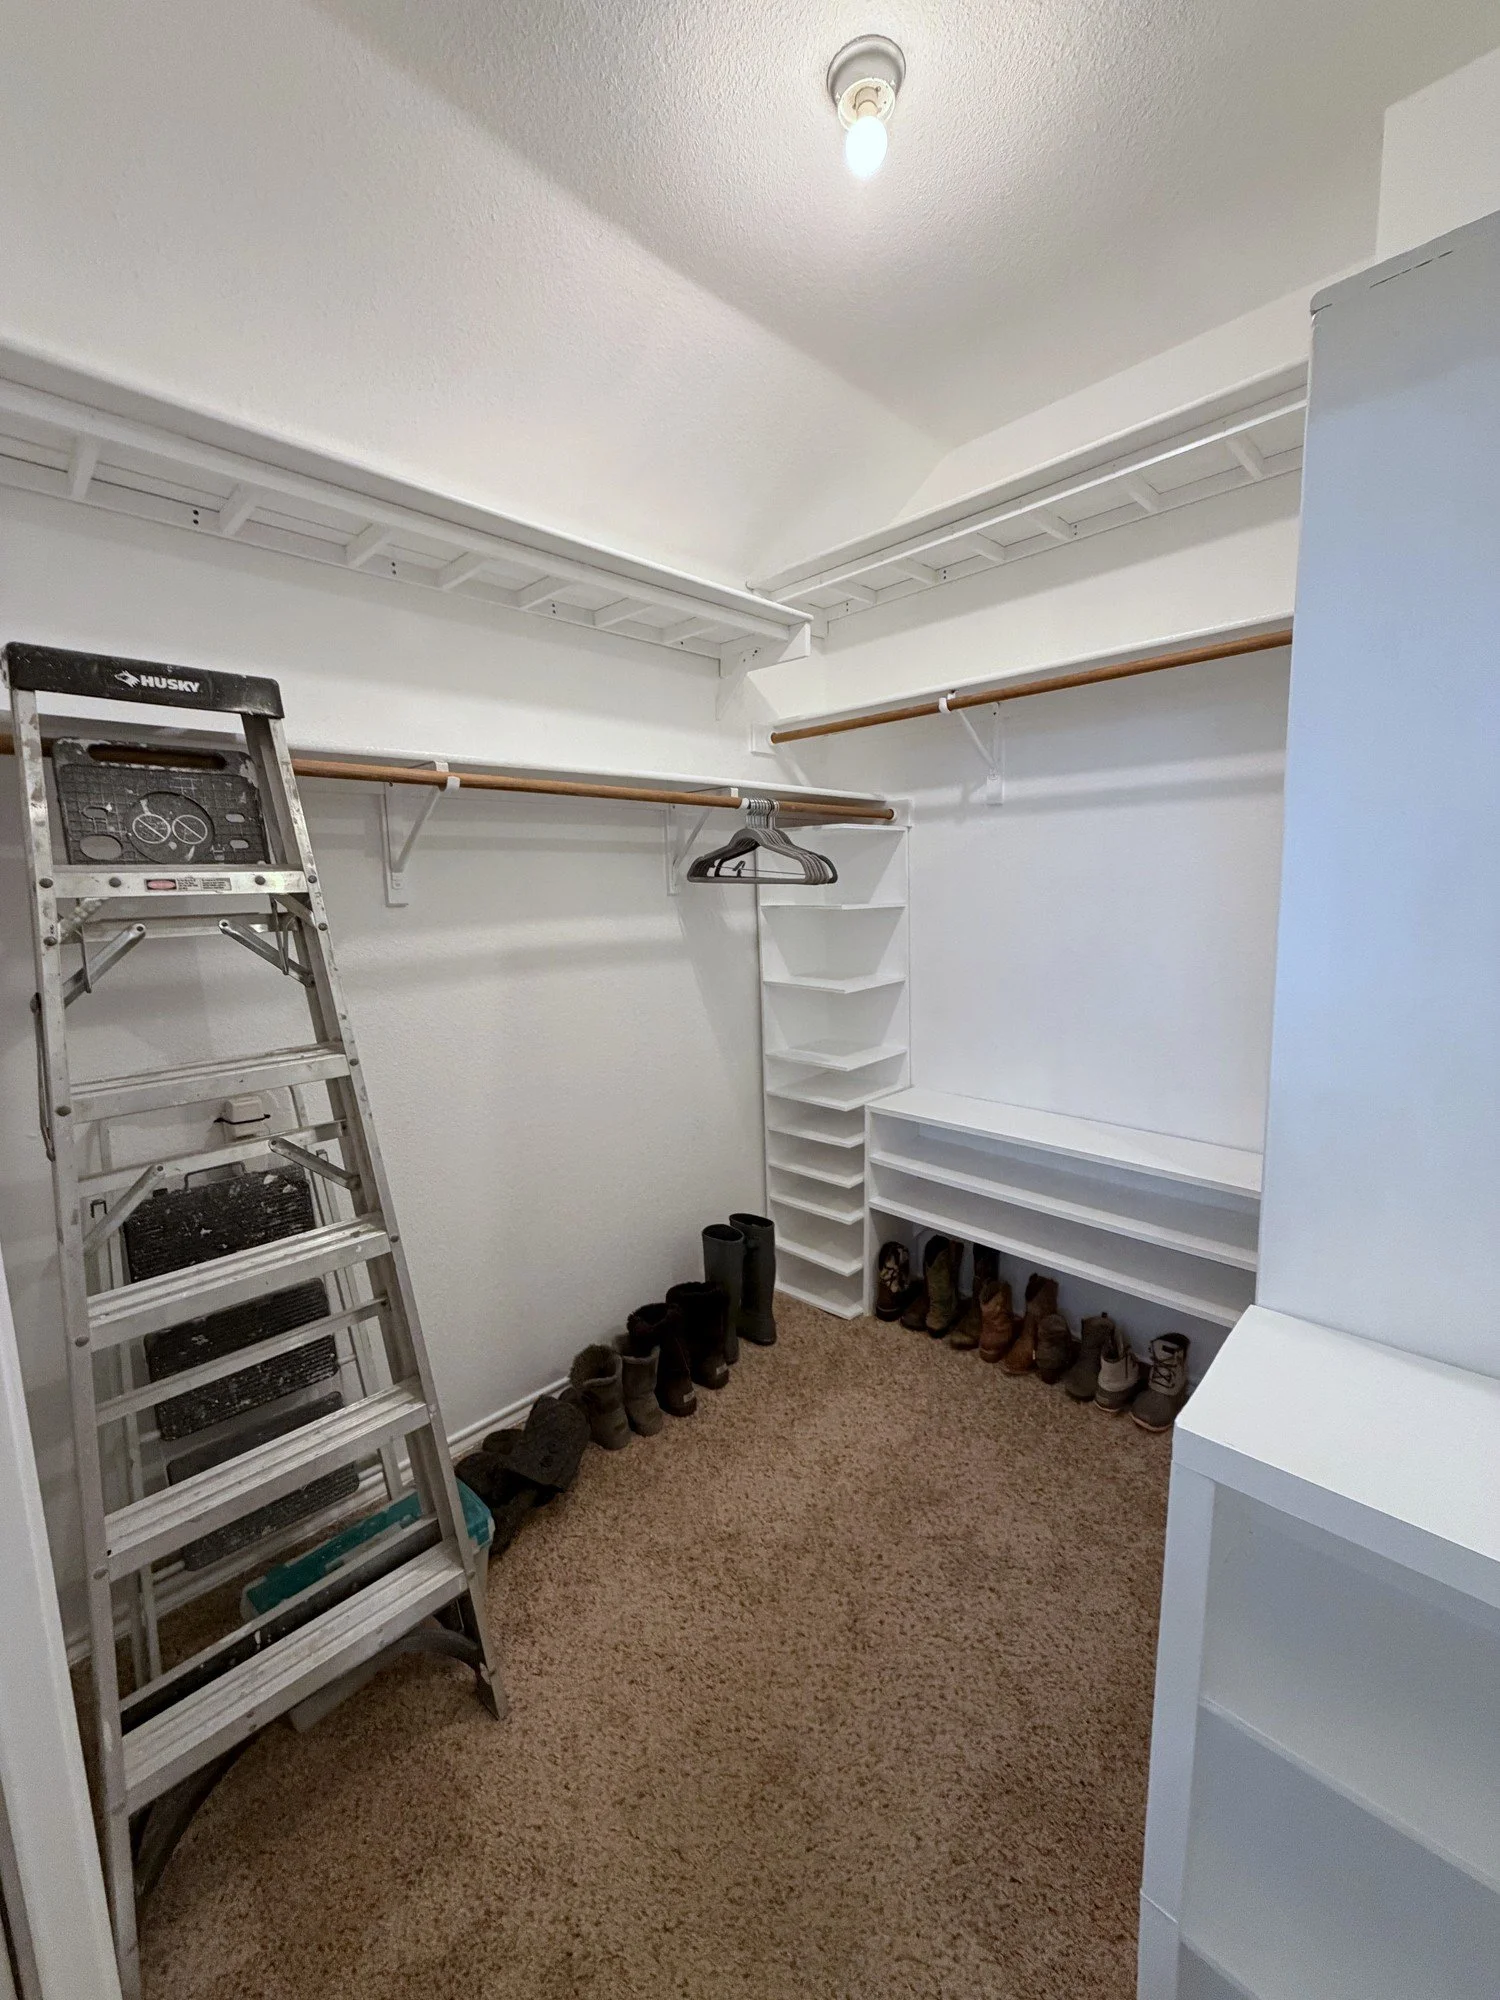
🎨 FIX #3- THE PAINT
I took out the wooden dowels where the clothes hang, then bought a paint sprayer and sprayed everything - walls, ceiling, and the new and existing shelves. Then I hand painted the trim.
The color is Behr Ultra Pure White, top to bottom. Marquee flat on the walls and ceiling, semi-gloss on the shelves and the trim.
Same color, two sheens. That's the whole trick. The sheen difference is what makes the built shelving read as part of the room instead of furniture somebody set against a wall.
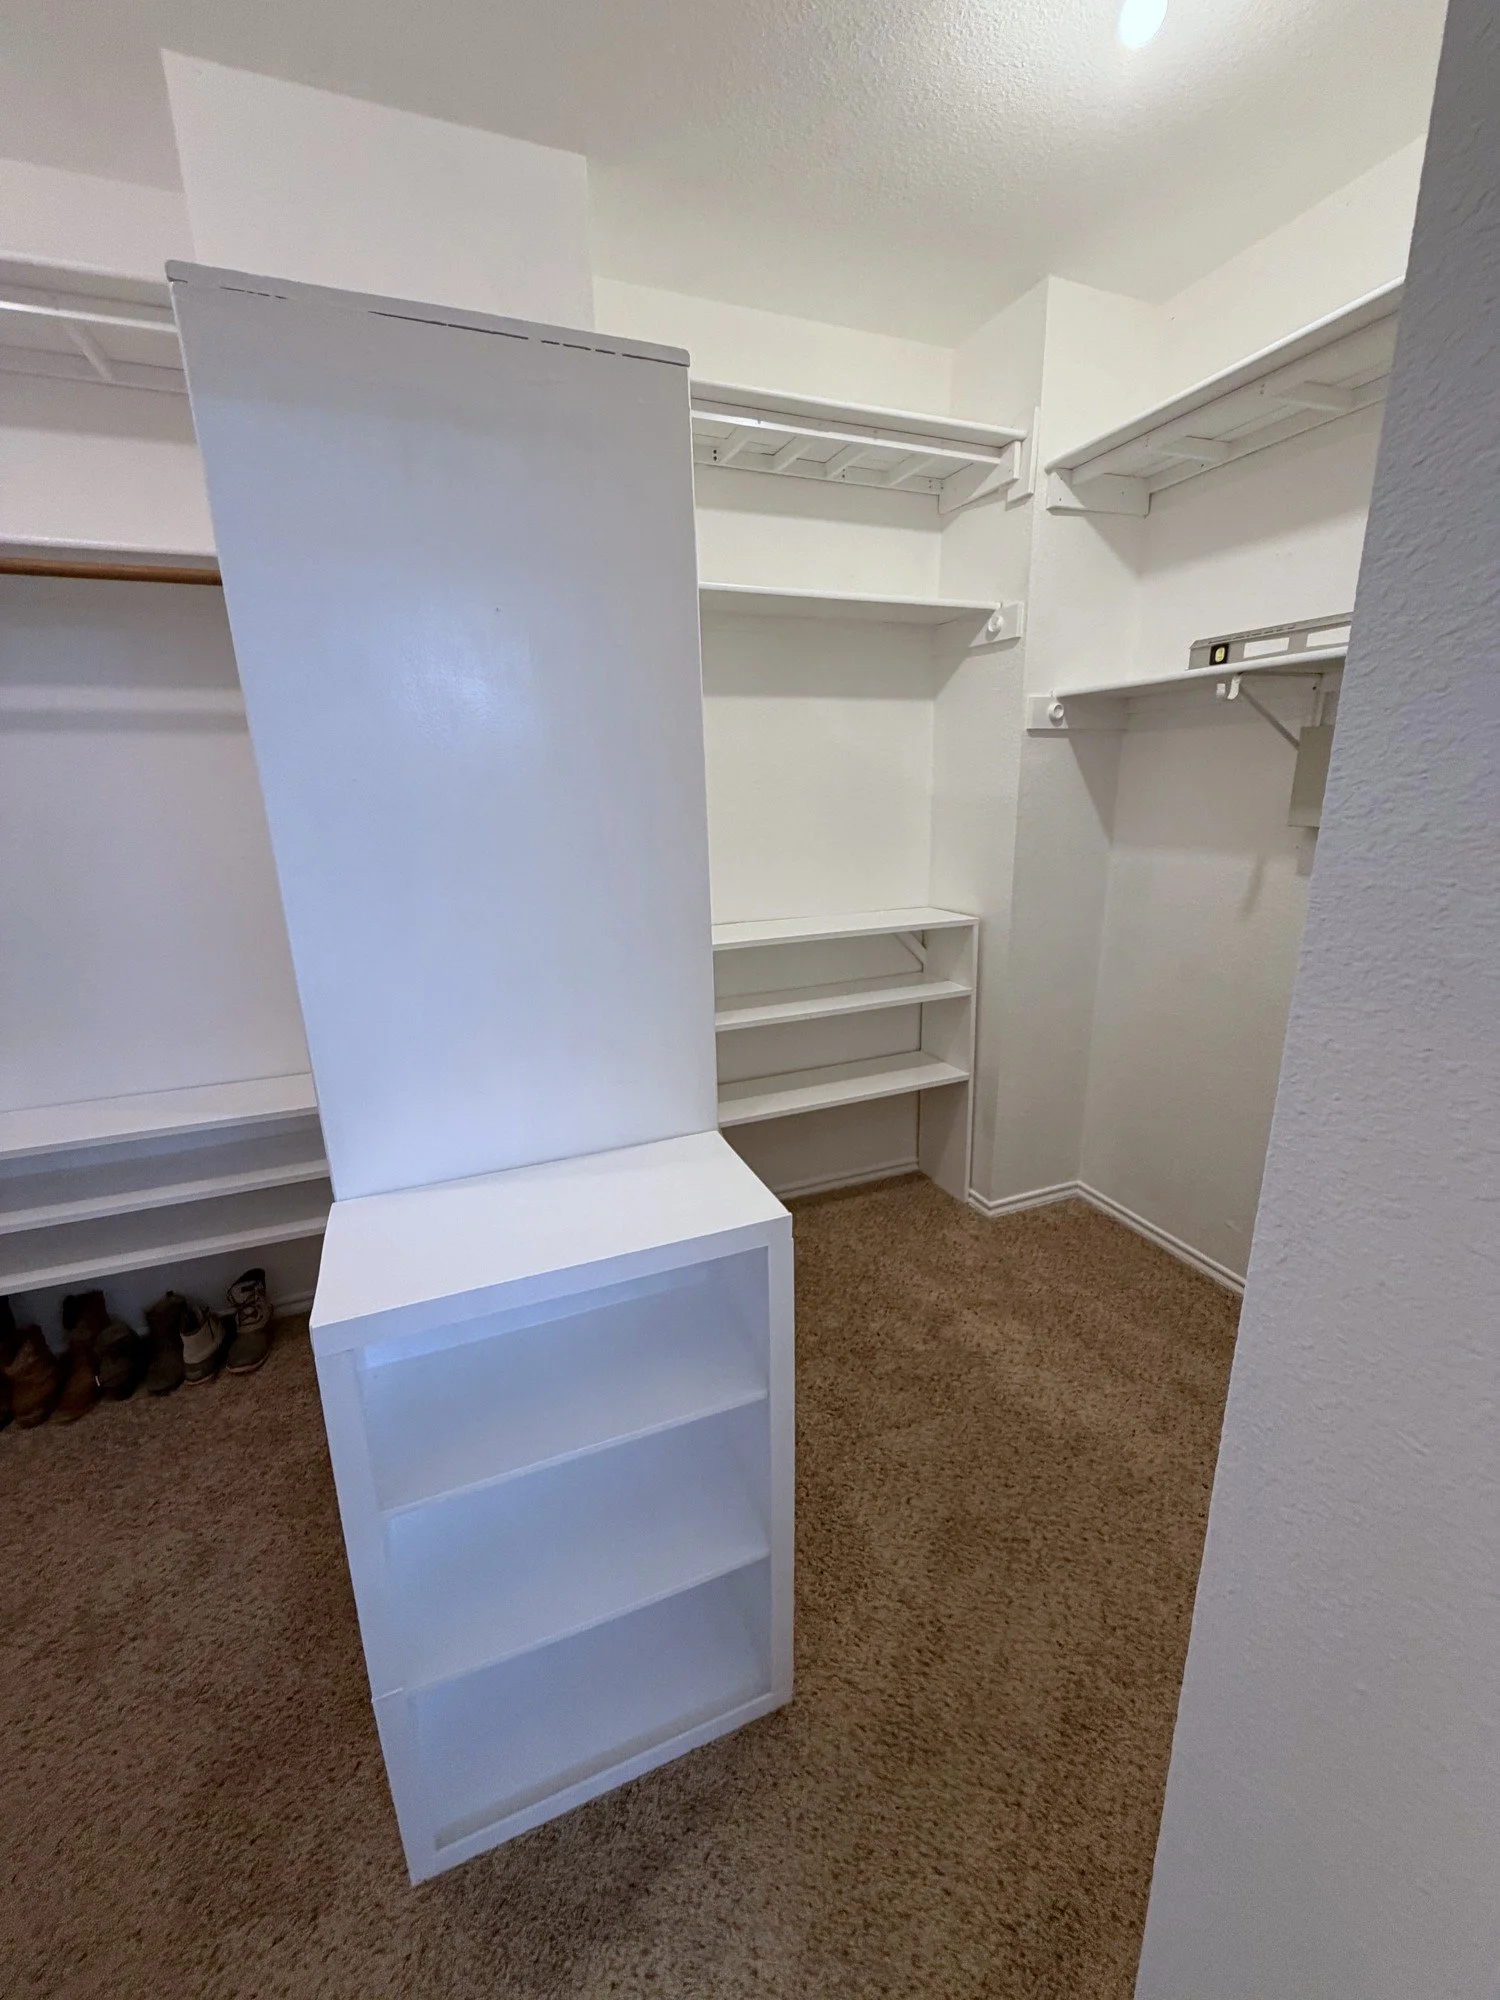
A brush would have taken a week. In a small room with that much shelving, the sprayer paid for itself on the first wall.
The one thing I'd do differently: buy real masks before you start. The sprayer came with a couple of flimsy ones and they didn't do the trick. After the first hour I stopped and sent my son to get these 3M N95 valved respirators instead. Soon after I began, I could smell the fumes, and I realized why God gave us nose hairs.
💡 FIX #4- THE LIGHTING
We swapped the bare bulb for real fixtures, I purchased and installed the Dondie flush mount, with the fabric shades from Wayfair.com. These were inexpensive and sold as a set, and now both his & hers sides of the closet look intentional and complete AND the brighter lighting allows us to see what we're putting on in the morning!
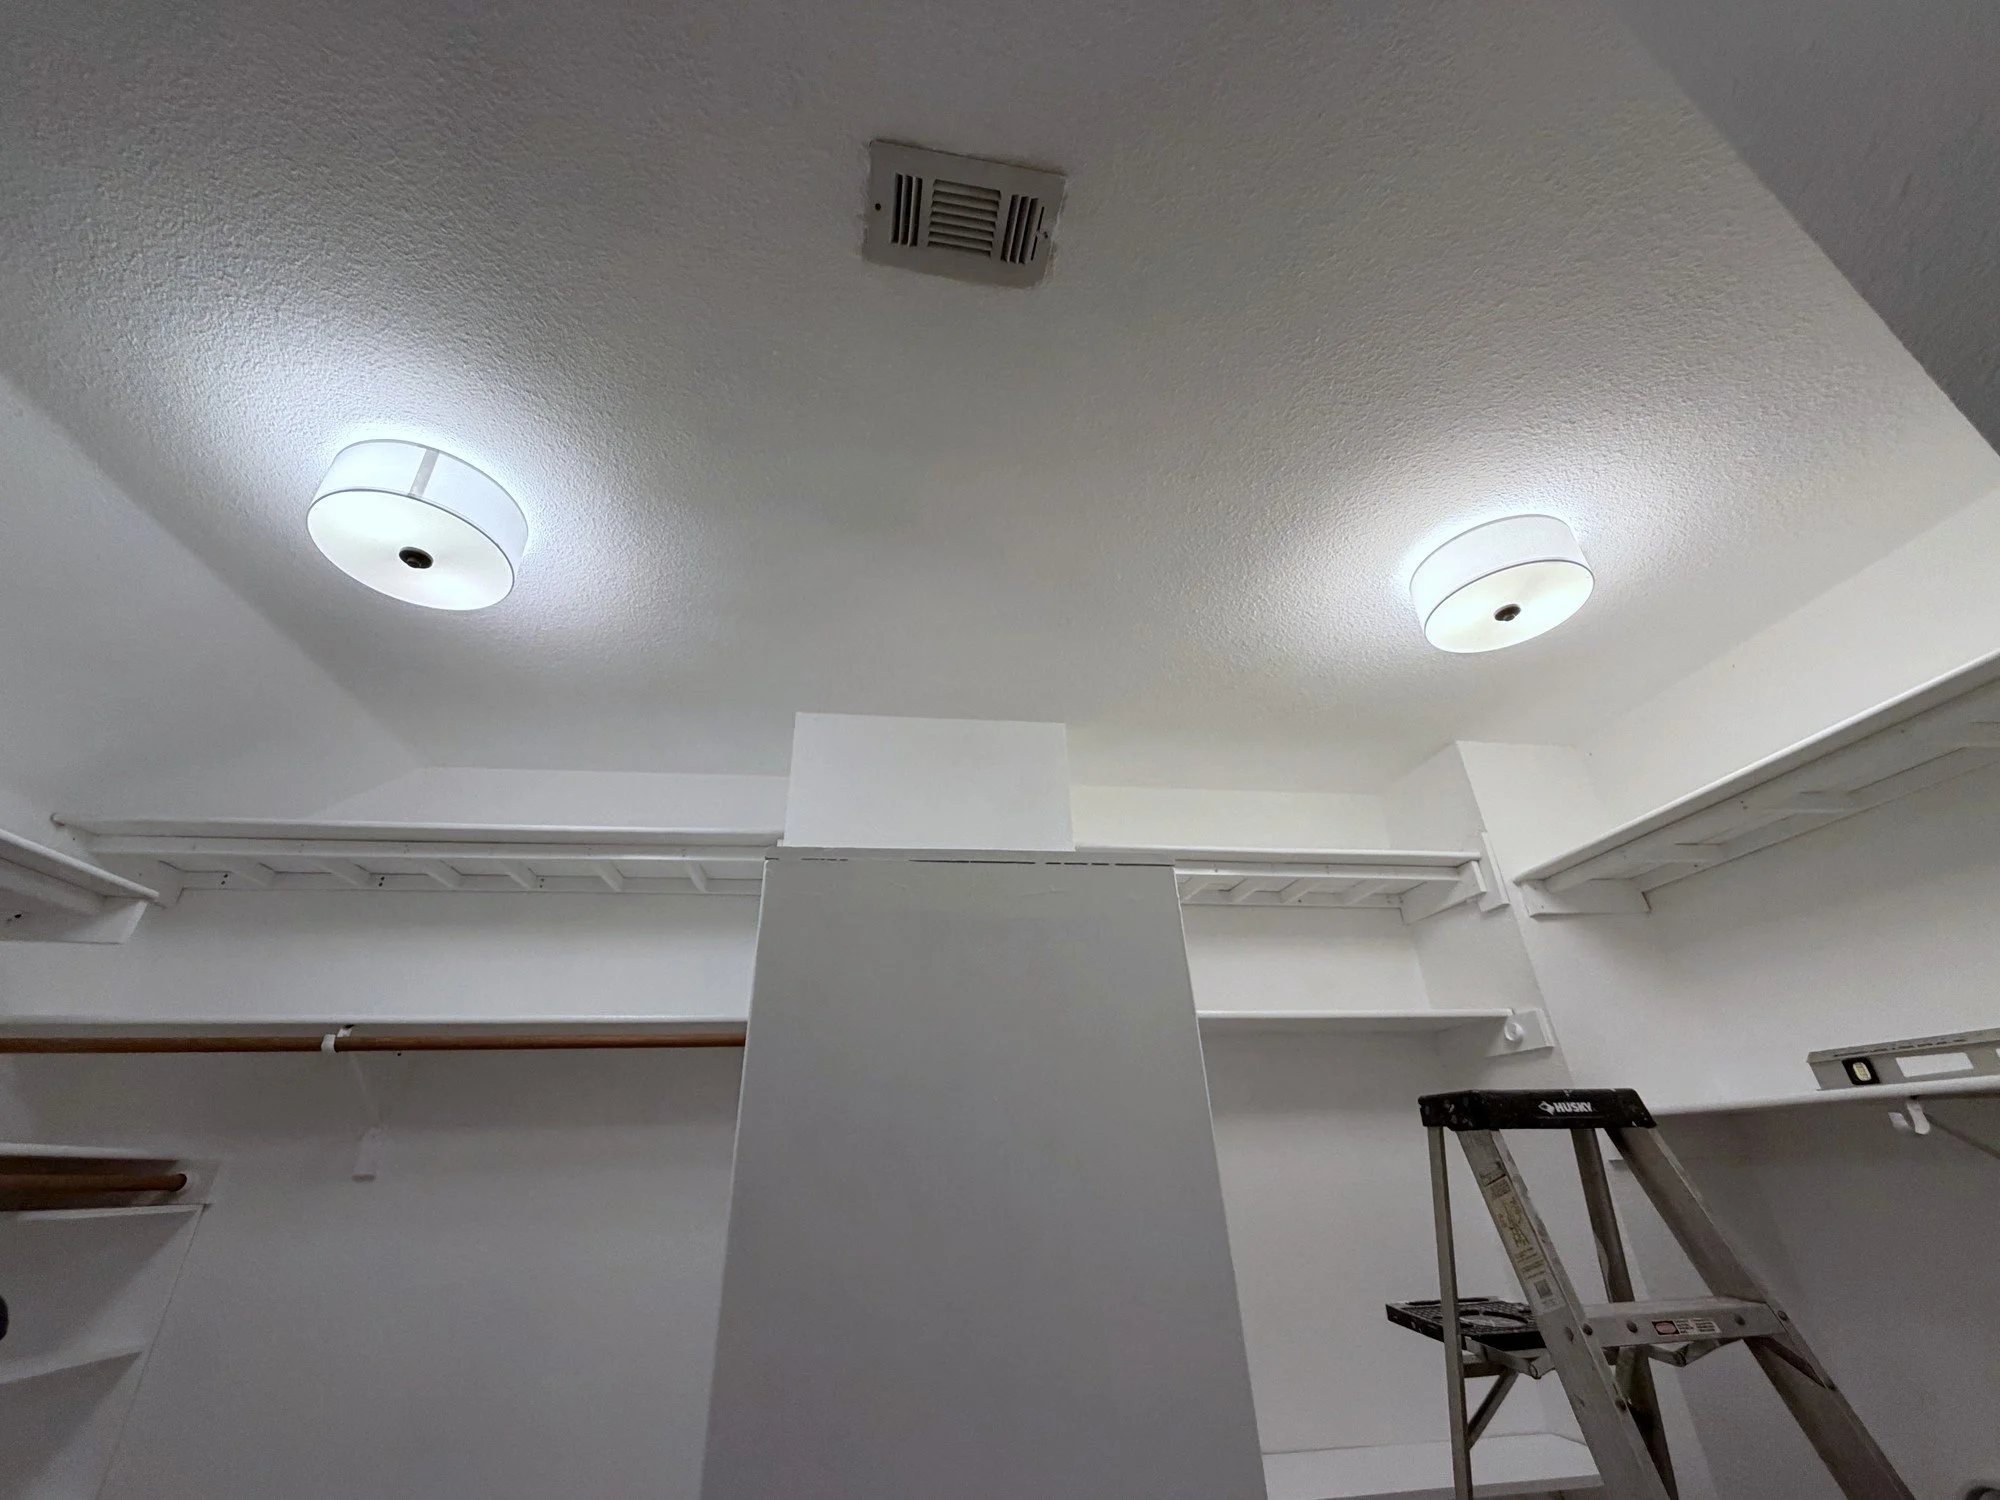
If you do one thing on this list, do this one. It's the cheapest square foot of improvement in the house.
👚 FIX #5- THE LITTLE THINGS
Matching hangers (& these). The easiest thing you can do to make a closet look calm, because it lines every shoulder up at the same height.
Shelf dividers. They keep stacks looking organized and force me to be more neat when putting laundry back.
A real hamper. Look at the before photo and you'll find a plastic laundry basket sitting on the floor. This was a significant visual improvement.
Storage bins (the Decomomo large fabric bins and these windowed ones) on the top shelf, labeled, for the things you need four times a year.
Wall-mounted hook racks. I removed the hodge podge of hooks we previously had and installed these matching ones to hang bags, purses and our robes.
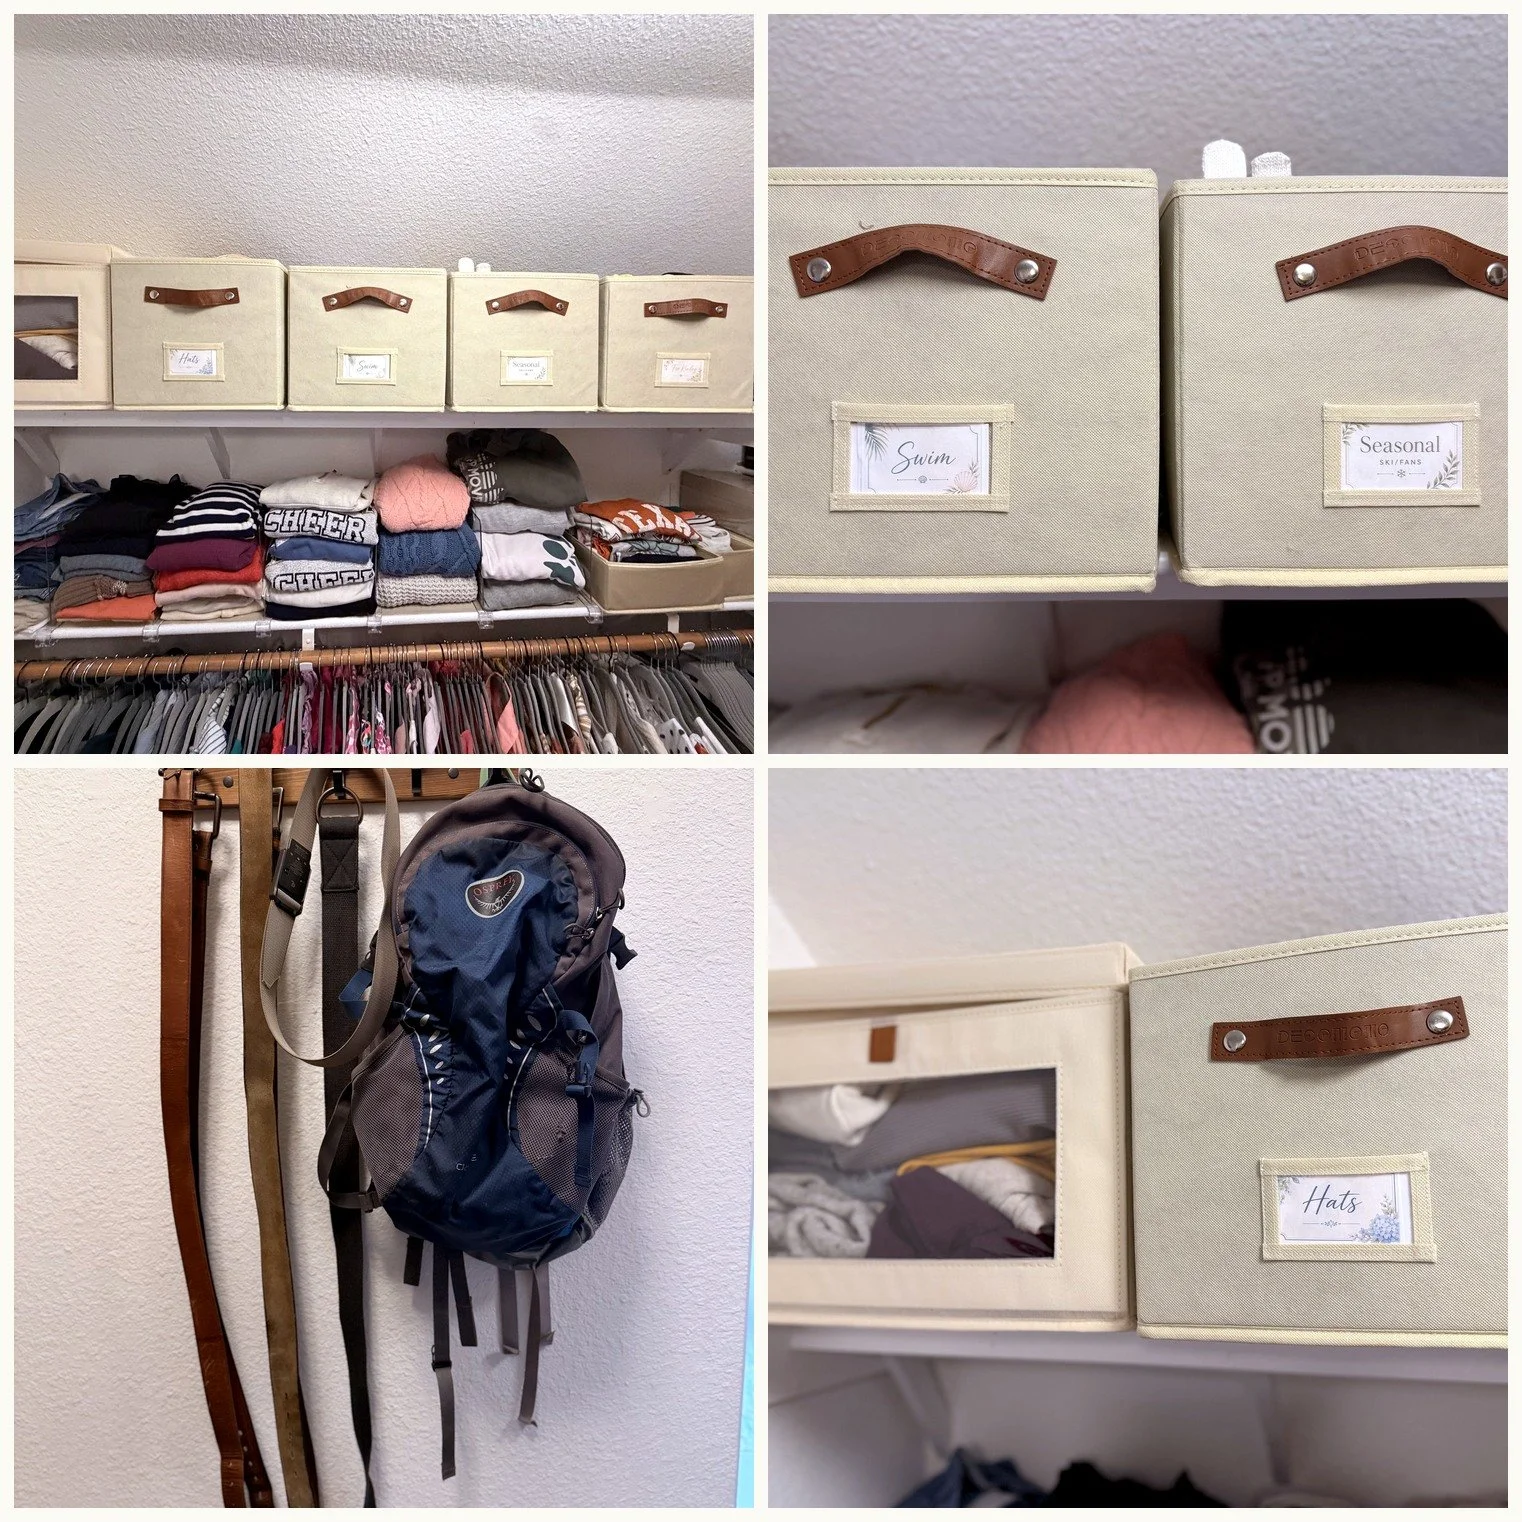
I used two different types of fabric storage bins to store seasonal items. I got 2- 2packs of the wall hooks. 2 were used to hang my purses and bags, and then one went on each my husband’s and my side of the closet.
⏱️ HOW LONG IT TOOK
3 days. I worked when I could and tried to make everyone stay out of my hair for one complete afternoon while I painted.
Some of it happened while dinner was in the oven. Nobody handed me a free weekend, and if I had waited for one, that closet would still be dark.
WHAT I WOULD TELL YOU
It has been 2 months, and the closet still looks great. (My side is a little neater than my husband's), but everything still lives in its new space and has been easy to maintain, which means it was a functional success!
On day 3, when I needed to focus on packing for that girls trip, I was regretting starting the project. But now, 2 months later, when it's clean, organized and doesn't feel suffocating, I'm glad I powered through.
Tell me what your closet is hiding.
abide & flourish
